In this article, we will review how to process Advances, Loans & Garnishments in SkySlope Books.
Important: At this time, the Advances, Loans, Garnishments screens can be used for logging these items but don't have the functionality to process the accounting side, follow the instructions below to learn more.
Advances
Step One: Create Bill for Advance
Note: You will first want to make sure you have a Product/Service created for Advances
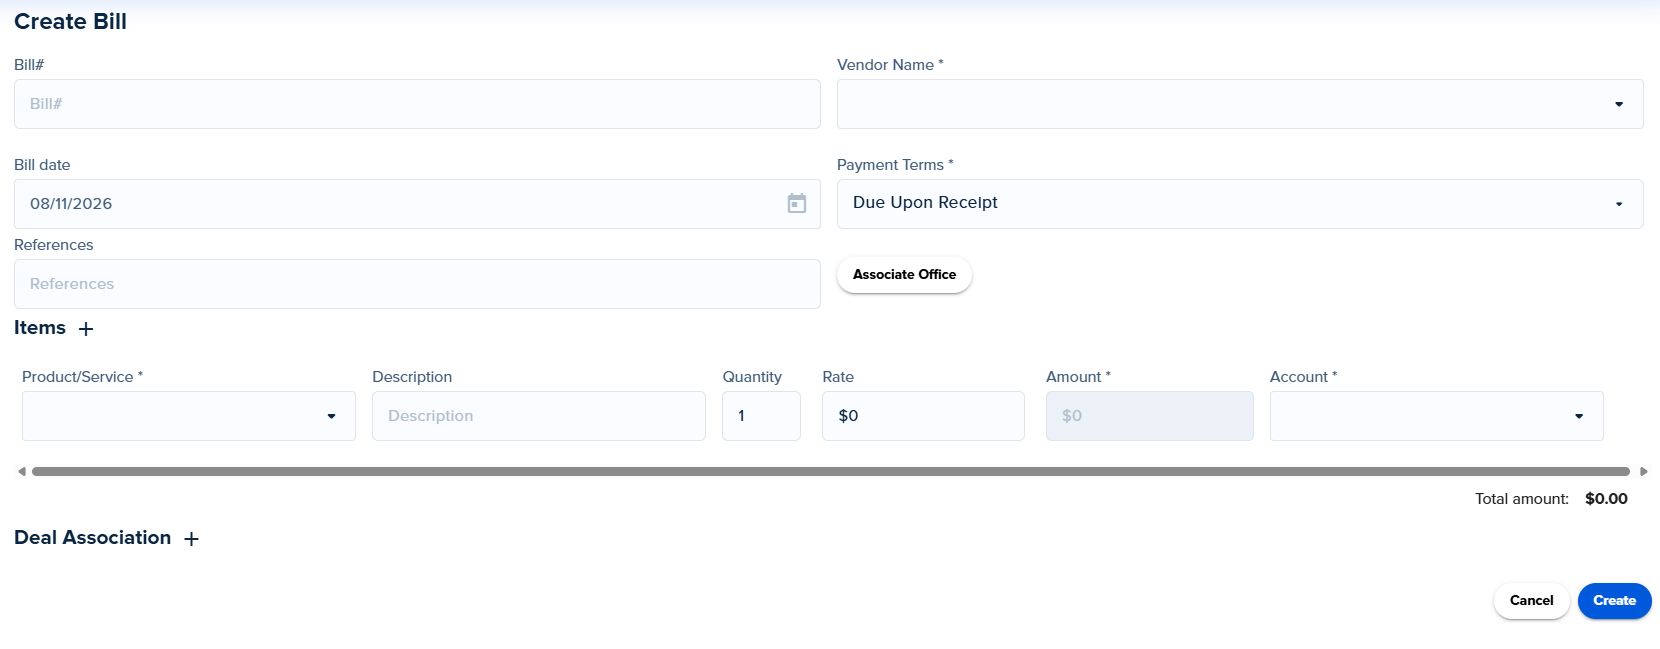
1. Navigate to Purchases (A/P) > Bills
2. Click +Create in the top right-hand corner of the screen
3. Complete all relevant fields
Bill#: If applicable, enter a bill number
Vendor Name: Add the agent that is receiving the Advance
Bill date: Enter any applicable date
Payment Terms: When payment needs to be completed by
References: If applicable, add reference number
Items +: Add the Product/Service created for Advances and Rate (amount of advance)
Click Create as Open
Note: The bill has now been created, however, you will still need to process the payment as shown in step two below
Click here to learn all about creating bills!
Step Two: Process Payment
When you are ready to process the payment for the advance to the agent, follow the steps below:
1. Navigate to Purchases (A/P) > Bills, locate the bill you created, and click on the line item
Tip: Use the Vendor Name filter to search for the agent
2. Click on Payment Options in the bottom right-hand corner of the screen
3. Select the appropriate payment option based on how you will be processing the advance to the agent
Direct Deposit
Print Check
Record Payment
Click here to learn all about payments on bills!
Step Three: Create Invoice for Advance Repayment from Agent
When you are ready to begin the process of repayment for the advance to the agent, follow the steps below:
Navigate to Sales (A/R) > Invoices
Click +Create in the top right-hand corner of the screen
Complete all relevant fields:
Invoices date: Add the date
Customer: Add the agent who received the advance payment
Allow to deduct from deal: Leave this checked if you’ll be deducting the invoice from the agent’s deal to recoup the funds
Payment Terms: When payment needs to be completed by
Items +: Add the Product/Service created for Advances and Rate (amount of advance)
Click Create as Open
Click here to learn all about creating invoices!

Step Four: Record Payment for Advance Repayment from Agent
After posting the invoice, you’ll need to receipt the funds from the agent as repayment for the advance.
Note: If the invoice is being deducted from the agent’s deal, you can skip this step.
Navigate to Sales (A/R) > Invoices
Click on the Invoice line item you created for the advance repayment
Select Record Payment in the bottom right-hand corner or use Charge Customer if using the Payload integration to automatically receive payment
After selecting Record Payment, complete the Payment Mode, Payment Date, Ledger Account the funds were deposited to and click Continue
The Invoice status will update to Paid
Learn all about recording payments on invoices by clicking here!
Step Managing Third Party Commission Advances:
For a third party advance that is issued to the Brokerage that is going to an Agent:
The Brokerage will invoice the third party for the commission advance.
The Brokerage will create a bill for the agent in order to pay the agent the advanced commission.
The Brokerage will invoice the agent and associated it with the deal to recoup the advance once the commission is received.
Finally, the Brokerage will create a bill for the third party to repay the advance, by using the deal association module in the bill there will be clear tracking and reconciliation.
Loan
Here is how to add a loan to the brokerage from a third party into Books.
Step One: Create Product/Services and Ledger Accounts associated with the Loan
First create the appropriate ledger accounts for the Loan:
One ledger account as a Liability for the principal of the loan
Another ledger account as an Expense for interest on the loan
Next, Create Product/Services for the Loan:
Create one product/service for the loan associated with the Liability ledger account created above
Create one product/service for the interest on the loan associated with the Expense account created above
Step Two: Create an Invoice
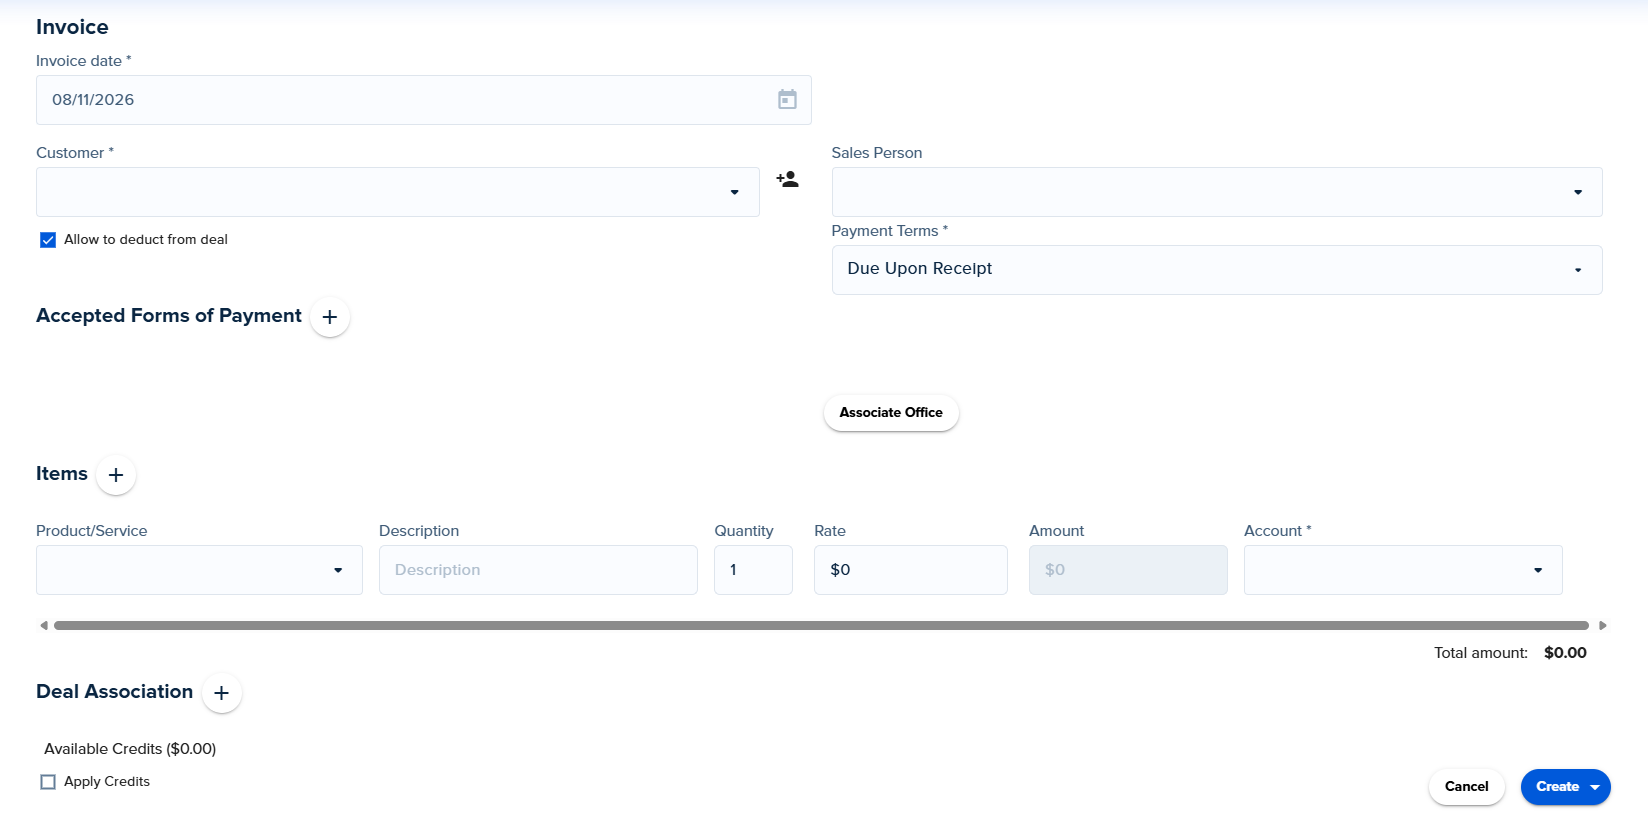
Invoice date: Date loan was funded
Customer: Add the name of the lender
Payment Terms: When the payment is due and payable
Allow to deduct from deal: Uncheck
Accepted forms of payment: Available for loan funding via the Payload integration
Items: Add the product/service created that is associated with the Loan and Liability ledger account
Rate: Enter the amount of the loan
Click the Create dropdown and select the appropriate option
Learn all about creating invoices by clicking here!
Step Three: Record Payment
After receiving the loan funds from the lender, you will need to record the payment for the invoice.
Note: If the invoice was paid via the Payload.co integration, you can skip this step.
Click on the Invoice line item you created
Select Record Payment in the bottom right-hand corner
Complete the Payment Mode, Payment Date, Ledger Account the funds were deposited to and click Continue
The Invoice status will update to Paid
Learn all about recording payments on invoices by clicking here!
Step Four: Create a Bill or Recurring bill for Repayment of the Loan
Depending on the payment terms, you can utilize the Bills screen to create a recurring bill or create a bill manually each time a loan payment is due. If creating a recurring bill and the payment will change, you will need to edit the bill each time to update the amount due.
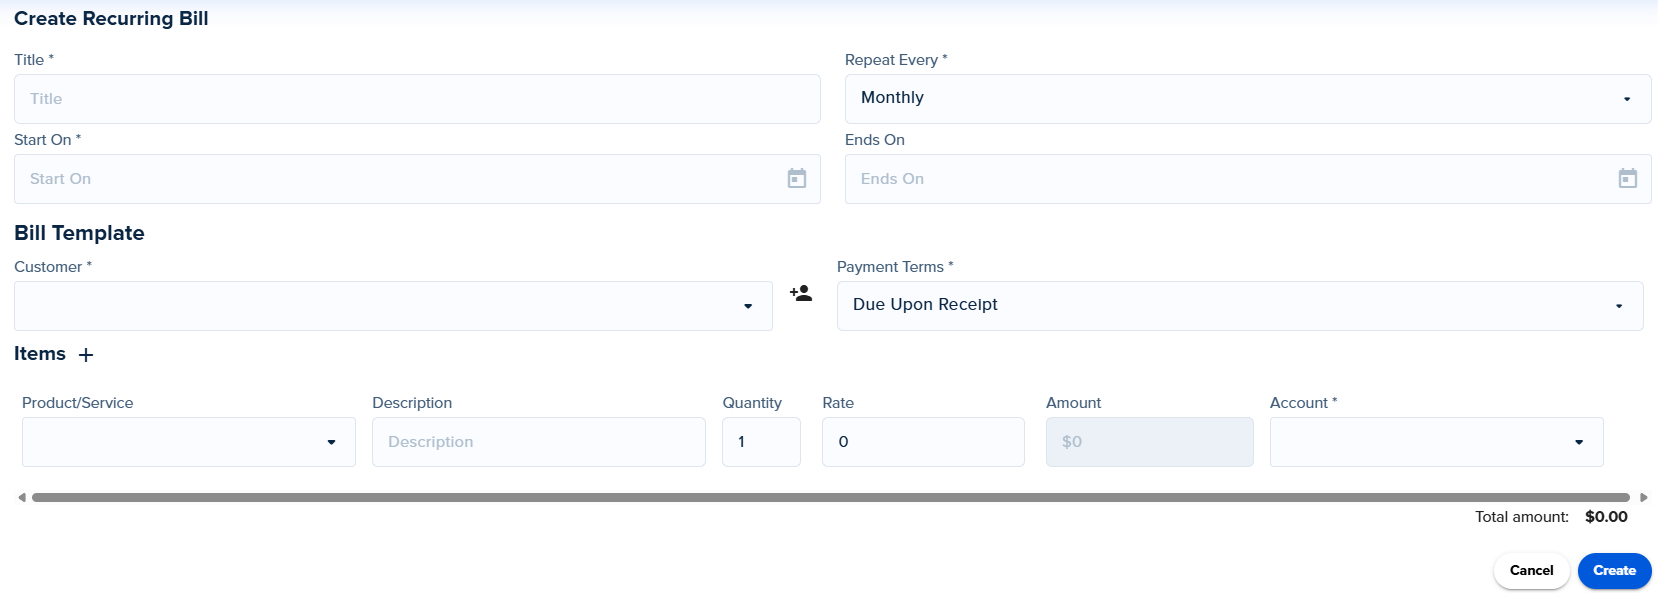
Title: Add a title
Repeat Every: Select the appropriate option on the frequency of payments due
Recurring Bill only:
Start on: When the recurring bill should start
Ends on: When the recurring bill should end
Customer: Add the name of the lender
Payment Terms: When the payment is due each time
Items +: Add the two Product/Services created for the loan and interest
For the product/service that is associated with the loan and liability ledger account, add the Rate for payment due without interest (principal only amount)
For the product/service that is associated with the interest and expense ledger account, add the Rate for interest due
Click Create once ready to save the bill.
Reminder: If a Recurring Bill is created, you may need to edit the bill each time to adjust the amounts due.
Learn all about creating bills by clicking here!
Step Five: Payment on Bills
When you are ready to process the payment, follow the steps below.
1. Navigate to Purchases (A/P) > Bills, locate the bill you created, and click on the line item
Tip: Use the Vendor Name filter to search for the lender
2. Click on Payment Options in the bottom right-hand corner of the screen
3. Select the appropriate payment option based on how you will be processing the advance to the agent
Direct Deposit
Print Check
Record Payment
Click here to learn all about payments on bills!
Garnishment
- Please contact your Customer Success Manager or the Support team so they can discuss options to setup a Commission Plan/Rule for Garnishments
Was this article helpful?
That’s Great!
Thank you for your feedback
Sorry! We couldn't be helpful
Thank you for your feedback
Feedback sent
We appreciate your effort and will try to fix the article
<\br>