Learn how to add the Skyslope Integration to Skyslope Books so you can begin pulling deals or have deals auto created from Skyslope into Books!
Step One: Activate SkySlope Integration
- Log into Skyslope
- Toggle over to Skyslope Books via the Apps drawer

- Right click on the word "Books" and select to "Open link in new Tab"

- You will now have two tabs open, one for Skyslope and one for Skyslope Books

- Navigate to the left Navigation bar in Books > Settings > Integrations
- Click on the All Tab > Scroll to the Skyslope Integration > Click Activate

- Click Continue

- The integration is now activated > Click on the activated tab and toggle on "Display in Main Navigation to create a shortcut in the left Navigation bar

Step Two: Obtain the Access and Secret Keys from SkySlope
- You will still have two tabs open one for Skyslope and one for Skyslope Books

- Click on the Skyslope tab, you will come back to the Books account shortly.
- Click on your username in the top right hand corner of the page and select My Account from the dropdown

- Next click on the Integrations Tab and then select Generate New Key

- The Access Key and Secret will both be visible, leave this pop-up open, we will use this information shortly

Step Three: Paste Access and Secret Keys from SkySlope into SkySlope Books
- Click on the Skyslope Books tab
- Click on the Profile icon on the upper right hand side of the screen and select Apps from the dropdown
- Under Company Addons, click on Connect next to Skyslope
- In the next screen you will be asked to allow Skyslope to access data in your Skyslope Books account, click Allow
- Next, you will be asked to authorize the applications by adding your Access Key and Secret Key
- Click back on the Skyslope tab and copy the Access Key, then navigate back to the Books tab and Paste in the Access Key field. Repeat for the Secret Key
- Click Authorize
- Next, click continue
- You will now receive a success message at the top of your screen as show below and now you may close out of this
- Next add the access and secret key to the Skyslope Integration
- Navigate back to the Skyslope Integration - Settings > Integrations > Skyslope and then Open or by clicking on the shortcut your previously created, then click on Company Settings in the top right
- Add the same Access Key and Secret Key to the Skyslope Credentials fields at the top of the screen
- Scroll to the bottom of the screen and click Save and Go to Skyslope Books


Note - Deals can now be imported into Skyslope Books two different ways via the integration:
- Auto creation from Skyslope to Books: Requires additional steps as shown below in Step 4 - If you are not ready to have deals auto-create in Skyslope Books, then complete this step at a later date.
- Manually Syncing Deals from Skyslope to Books: If your brokerage will be manually pulling deals into Skyslope Books via the Integration, learn the steps in this article!
Step Four: Complete Company Settings for Auto-Creation of Deals
Important: Do not complete this step until you want deals to start auto-creating in Books for Deal Processing!
- Navigate to Settings > Integrations > Skyslope Integration
Click on open > Company Settings
Review each option below and select the appropriate options based on your brokerages preferences:
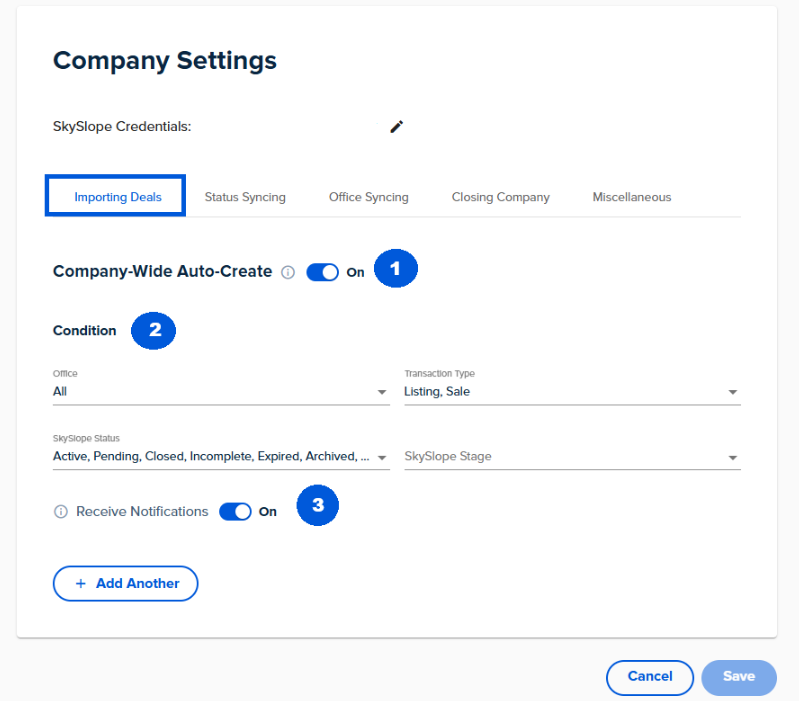
Importing Deals Tab:
- Company Wide Auto-Create: Toggle this on once you are ready for deals to be pulled in from Skyslope
- Condition: Select the appropriate options based on what transactions you want to pull into Books
Skyslope Office: Click on the dropdown and select each office that will have deals imported into Books. Important: Selecting "All" will not activate the trigger for all offices, you must check each office individually.Transaction Type: Select from dropdown, Sale is most common.
Skyslope Stage: Select from dropdown from any stages you have added in Skyslope.
- Receive Notifications: Click here if you would like to add additional transaction types or statuses.
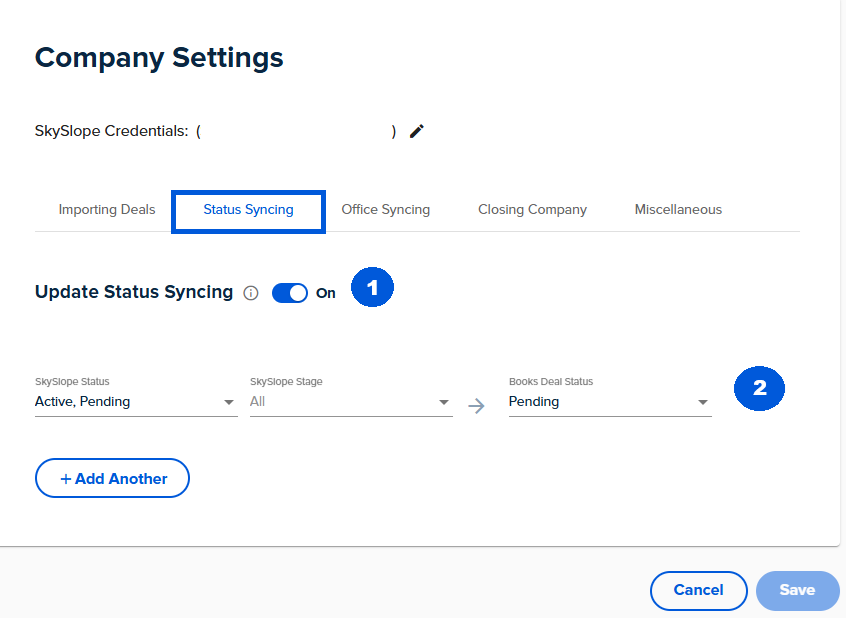
Status Syncing Tab:
- Update Status Syncing: When this is toggled on, Books status will update based on the Skyslope status.
- Select from the dropdown what statuses in Skyslope you would like to update as in Books.
Office Syncing Tab:
Map Skyslope Offices to Books Offices (if applicable):
The Skyslope offices will be displayed in the first column and the Books offices will be displayed in the second column. Click on the dropdown to select the appropriate Skyslope Books office/division for each Skyslope office
.
Miscellaneous Tab: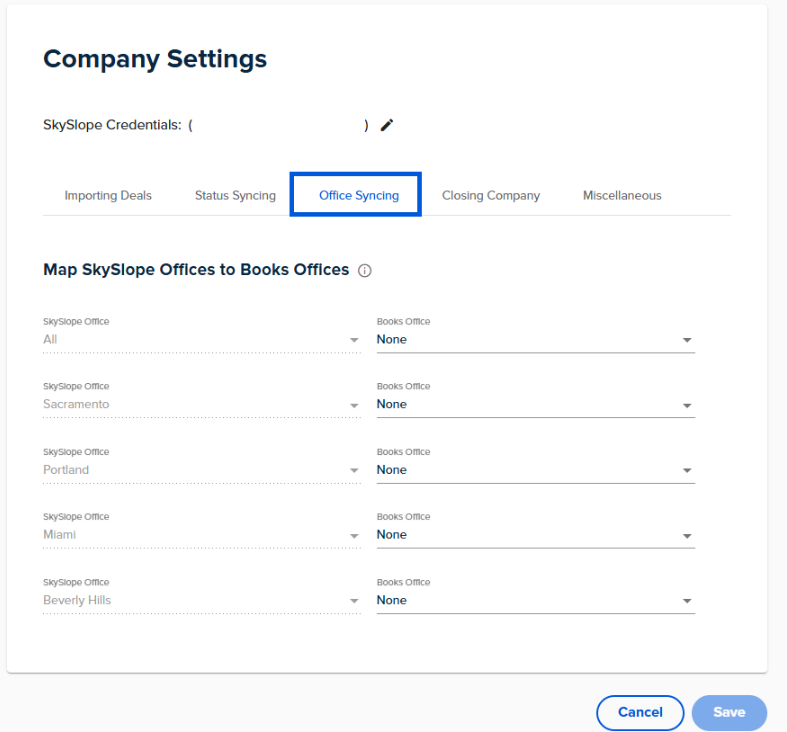
Closing Company Tab:
Map Closing Company: Select which contact type you would like Books to pull the closing company in from Skyslope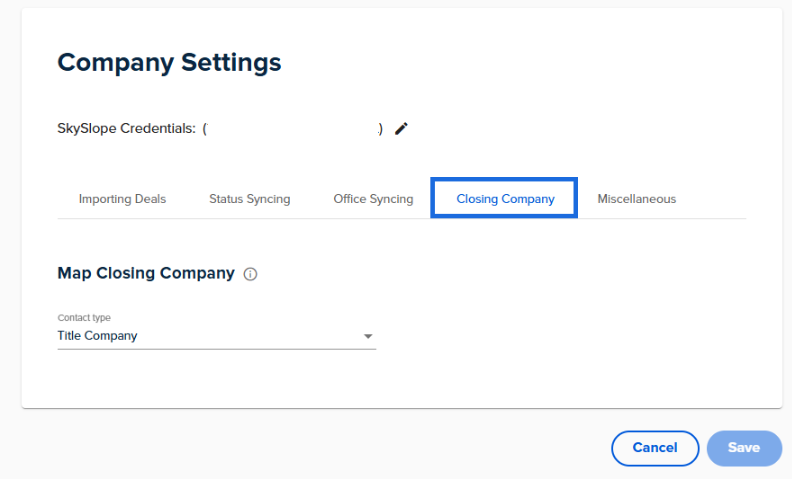
Document Auto-Uploads: The Disbursement PDF & Trade Sheet will both populate into the Skyslope documents tab when a deal is approved. Toggle one or both off if you don't want them pushing from Books to Skyslope.Defaults for referral Transfers: Ignore this option
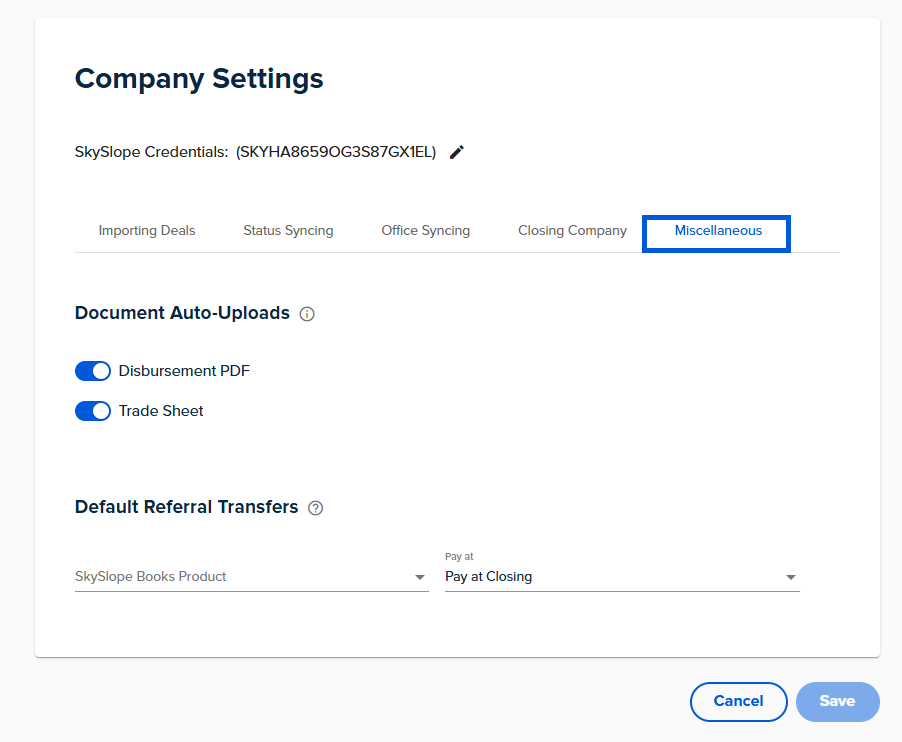
Once all options are selected click save!
Was this article helpful?
That’s Great!
Thank you for your feedback
Sorry! We couldn't be helpful
Thank you for your feedback
Feedback sent
We appreciate your effort and will try to fix the article
<\br>